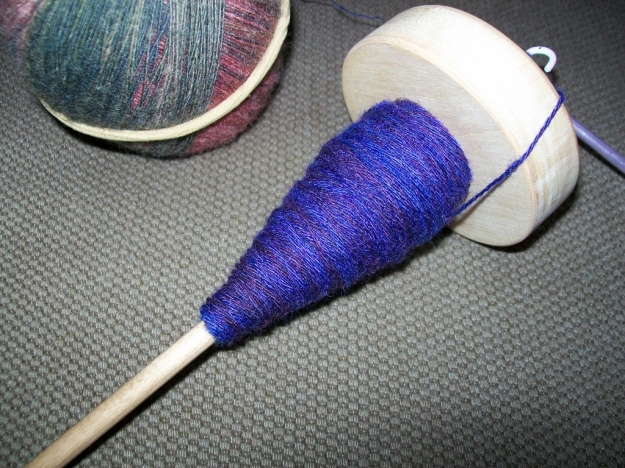
Homemade yarn, just beginning the plying process
It’s been a bit of a while since I posted—I blame my busy social calendar and regret nothing—so I’ve got a fair bit to share with y’all today.
Yesterday I had a really good crafting day: I successfully re-dyed a shirt that had gotten pinked in an Unfortunate Laundry Incident, as well as playing with dyeing tatted pieces. I worked a little bit on the blouses I’m assembly-line-ing, and had good luck with my serger. I also had good luck with plying my home-spun wool; I came up with a way to make the colors work out and it’s looking like real yarn now.
I’ve also done a fair bit of tatting in the past month, started and nearly finished a pair of mitts out of my Christmas present yarn, and chugged away on the blanket and scarf I talked about in my last journal post. The blanket is now about halfway done, hooray hooray, and I’ve picked up enough yarn to finish the scarf.
In tatting news, I did a bit of design, both yesterday’s pattern and a modification of this pattern that I like rather better but is fiddlier to do (I intend to post a pattern for it in a bit). I’ve been playing with variegated thread, reproducing the beautiful bracelet that I made as a gift and failed to take pictures of, among others. I also made a butterfly bracelet with beading, which worked well. Photos:

Three new bracelets

Bracelet in blue/white multi

Beaded butterflies

Crowns bracelet in “ocean” multi

Wearing my new bracelet

Stripey mitts
The mitts are pretty straightforward double-crochet spiral things. I am striping them in the two yarn colors, with the interface between stripes being alternating stitches of the different colors. I’m pretty pleased with the starting row—I chained along the length of my hand, then chained back putting a treble crochet every third stitch to make four separate finger holes. The yarn is bamboo/wool, so very soft and warm, and it’s thicker gauge than I usually work with so the mitts are going quite fast and coming out bulky and lovely. I made the two mitts have opposite colors—red on top vs. gray on top—on purpose, in case you’re wondering.

Opposite colors
I did intend to learn broomstick lace crochet with this yarn, and I tried to make a pair of mitts that way, with the first row of lace holes being the finger holes. Suffice to say broomstick lace in the round is tricky and not for beginners with improvised tools. So I ripped that out and started again with ordinary crochet. I do want to do broomstick lace at some point—probably the next time I have yarn that’s begging to be a scarf. I did learn that the packaging for a zipper makes a pretty decent flexible “broomstick”, for whatever that’s worth.

Sewing table with serger
In sewing news, I picked up some fabric a while ago and it has been patiently waiting to be turned into blouses. I finally cut it this week—stacking all three pieces of folded fabric and cutting together, so let’s hope I don’t find any wrinkles—and hauled out the serger yesterday. I was, let’s say, pleasantly stunned to find that this old beast was still in good working order, threaded (!) in the correct color for two of the blouses (!!) and had good tension settings for the fabric (!!!). I was expecting to chew through quite a bit of scrap fabric getting it into that state, as the last time I recall having the machine out it was not doing so well on any of those counts. Evidently I either a) have completely forgotten the last time I used it, or b) have an infestation of wonderful. wonderful sewing-machine-mending gnomes in my house. At this point I can’t even think of any project I’ve made that would’ve used the serger and blue thread, so I’m leaning towards explanation b.

Lovely serged seam
At any rate I am pleased with how the serger is doing. I tend to think of it as for knits only, but I’ve been irritated with the thick seams on the other blouses I’ve made, so I decided to give it a go. I’m a little nervous about a few things—the measurement of the seam allowance on curves, for one, since the knife and needles are fairly far apart and the guideline is at the location of the knife; I’m also worried about fitting the very different curves on the front princess seams, since I have to take the pins out at the knife point and hope the fabric stays in place until the needle. I guess that’s what the foot is for and I should just trust it. Wish me luck!
In dyeing news, I had an Unfortunate Laundry Incident a while ago where a non-colorsafe red thing pink-blotched two of my favorite shirts (the patchwork ones), plus a shirt I didn’t care about as much, a bathroom rug, my nice gray sweatpants, and so on. Two of the affected shirts were blue, so I decided to pick up some purple RIT dye and see if I could remediate them that way. I’m pleased to say it worked on the one I cared less about, and used only half the dye, so next time I have a good chunk of free time I think I will try it on the blue patchwork one. Not sure what to do about the brown shirt, unfortunately. Plus, while I had the dye out, I dyed a test bit of tatting just to see how it would do. The results are lovely, meaning I suddenly have a lot of options for all this white thread I have around. Photos:

Comparison of the dyed shirt with a piece of the fabric it’s made from

Blue shirt, before dyeing. The pink blotch is in the center bottom area

Dyed shirt drying

Dyed shirt after. A bit blotchy, but the pink isn’t noticeable

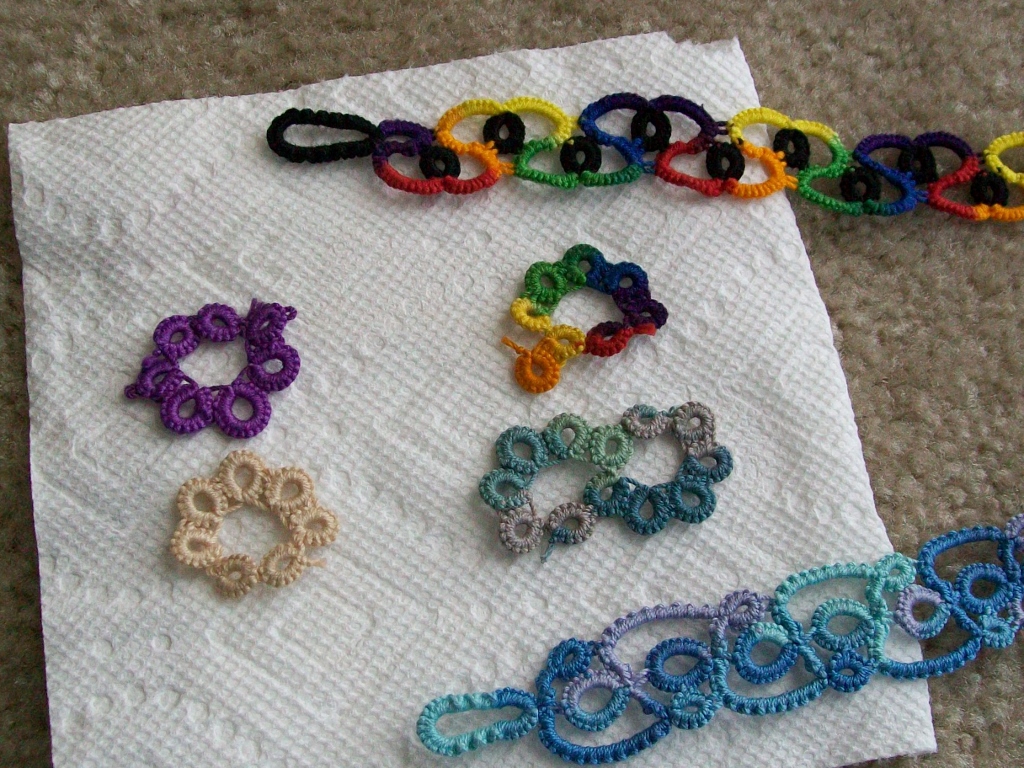
Tatting test piece, before

Tatting piece, after dyeing
The color is a little blotchy/uneven, but it looks a lot more deliberate than the single pink splotch it had before. I’m hoping it’ll be even less noticeable on the patchwork shirt, which is made of patterned fabric and is lighter-weight than this one, making it easier to dye evenly in my little basin. I’m particularly pleased with how similar the coloring is between the shirt and the lace bits, considering they’re made out of different fibers and all; I was prepared to have to snip the lace off if it didn’t work well. I did learn one interesting thing: slight deodorant stains make the fabric pick up more (purple, RIT-brand) dye than it would otherwise; hopefully not by a noticeable amount when it’s worn.

3-plying setup with crochet hook.
Last but far from least, I am thrilled to report that plying the homespun wool is going well. I had been planning on 2-plying it, matching end to end and working towards the center, making the yarn be multicolor at every point. I tried that. It looked terrible. So I laboriously un-plied the few yards I had done and tucked the thread away for a while to think about what it had done. Eventually I came up with a brilliant idea: 3-ply the sucker, working in crochet-like chains, making each section of yarn be all one color. It’s going really well: I love the colors of the yarn, and 3-ply brings me a lot closer to the sock-weight store-bought yarn I’d like to use it with. I’ll report again once I get more of it plied, but am really pleased so far.