Paired hearts choker
Today’s pattern is a tatted choker in the form of a row of tiny hearts, leaning back and forth in pairs. The hearts use a spiral chain (or Chinese staircase, or Josephine chain, or whatever else you want to call it) to achieve the dimple at the top, and are super easy to make. I normally dislike chokers (if you’re wondering why, read the name again), but tatting has enough give to it that it’s actually quite comfortable, without being loose.
For the choker you will need:
- Fittings, such as a lobster clasp and jump ring
- Embroidery floss: one full skein and part of another for the hearts, and part of a skein for the chains
- Tatting needle, size 5, or shuttles (you’re on your own for converting the pattern to shuttles, I’m afraid)
If you want to make a bracelet, you’ll need less floss, and for a loose necklace more; if you want to make an edging or trim this pattern still works, just don’t bother with the fittings and start with the first ring in the pattern. I drafted the pattern on size 20 crochet thread with a size 7 needle, so can verify that it works at that size.
Note: the pattern decidedly has a right and a wrong side, at least in my opinion; the ridge created by the spiral chain wants to face outward. If you follow the directions below, the clasp will be operated by the right hand, closing behind you; if you are left-handed or if you prefer to close necklaces in front of you and then spin them around, you may wish to begin with the jump ring and end with attaching the clasp. If you are left-handed and prefer to close necklaces in front, proceed as written. If the fittings you have are symmetric, ignore this.
Pattern:
 Thread one end of both the hearts-color thread (variegated pink in my example) and the chains-color thread (white in my example) through your clasp, pulling out a tail of about 3″. Holding all four threads together—both tail ends and both long pieces—tie a single overhand knot and cinch it down snug against the clasp. As always, click for larger photos.
- Thread the hearts-color floss onto the needle; the chain-color thread is your ball thread.
 Using a small clip or a bit of tape or a small elastic, hold the ends of the tails of floss against the needle (see photo). Chain 6ds onto the needle, over the tails of floss, close to the knot you made in step 1. Pull off the needle as usual, and pull on the tails as well as the needle thread to make sure they aren’t bunched up in the stitches. See the mini-tutorial below for tips.
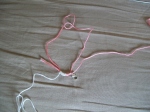 Put your needle through your clasp and draw through most of the floss, leaving a foot or so between the work and the clasp (see photo). This will let you slide the clasp onto a picot in the ring you are about to make.
- Start a ring: make 4ds on the needle with the needle thread that’s between the work and the clasp. If you are confused about using the needle thread to make knots, peruse my tutorial here. Some needle tatters use the ball thread for all knots, making an overhand knot to switch threads every time they turn the work; that is not how I tat and you should not be making any overhand knots in this pattern except to attach fittings.
 Continue the ring: slide the clasp down against the stitches you just made, make a tiny picot with the clasp on it, and make 6ds. See photo at right.
- Continue the ring: make 4 single stitches that are “first-half” stitches, that is, as if you were starting a double stitch. As you do, let the thread come forward around your needle until you are working on the opposite side of the needle.
 On that side of the needle, make 2ds. Make 4 single stitches in the opposite direction—“second-half” stitches—to come back around the needle. Finish the ring with 2ds, picot, 8ds.
- Slide the knots off the needle as usual and pull the needle thread through to form up the ring (again, I invite anyone who doesn’t usually make rings this way to peruse my tutorial).
 Pull the ring good and tight; I am one of those tatters who pulls everything neurotically tight, and I’m not sure this pattern will work if you don’t. You may need to manipulate the ring a bit with your fingertips to make it nice and heart-shaped, and use your needle or fingertips to position the 2ds at the top of the heart in the inside of the ring. It won’t be terribly sharp, but it should be recognizably heart-like at least.
- Chain 20ds.
- Ring 8ds, join to previous heart, 2ds, 4 first-half single stitches, 2ds, 4 second-half single stitches, 6ds, picot, 4ds.
- Chain 4ds.
- Ring 4ds, join to previous heart, 6ds, 4 first-half single stitches, 2ds, 4 second-half single stitches, 2ds, picot, 8ds.
 Repeat steps 9-12 until you have a length you are happy with (see mini-tutorial below if you run out of thread before you are happy with the length). That is, hold it up against your neck; make sure to account for the jump ring/other half of your fittings that must still be attached. Finishing will add the length of the fitting plus about a quarter inch from the edge of the last ring. My choker is 24 rings long and about 13″, for reference. End on a ring, but it doesn’t matter which one.
- If you ended on a step 10 ring, chain 6ds. If you ended on a step 12 ring, chain 15 ds. Slide the chain off the needle and pull snug.
- Put the needle through the last dangling picot and pull the needle thread through. Make a square knot between the needle and ball threads (or whatever kind of non-slip knot pleases you).
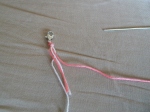
 Attach the fitting: if you are attaching a jump ring at this point, I recommend using the needle (or a tapestry needle if you have one handy, as it’s shorter) to tie two or three double stitches around the jump ring with the needle thread, then switch the needle to the ball thread (cutting to about 6″ length if necessary) and tie two or three double stitches in the opposite direction with it. Pass both threads through the space between the square knot and the jump ring (or any other convenient space, just to get them back away from the business end of the jump ring) and, holding them together, tie a single overhand knot in both. Trim 1/8″ from the knot. You are finished! Go try it on.

Me trying on my pretty new choker
 If you are curious, the photo at right shows my drafting process for this piece. First, there’s the mangledy thing in the bottom of the picture, a row of unconnected rings joined only by short chains, while I worked out how to make the least ugly heart ring I could. I actually quite like the tiny ones, too—they are 4ds, 4 first-half single stitches, 4 second-half single stitches, and 4ds in a ring—but they didn’t fit what I needed for the choker, so maybe I will use them in something in the future. Once I had settled on a heart ring I liked, I needed to work out the chains and joins, and that’s what the top piece is. I already had a pretty good idea of how I wanted them to join, rocking back and forth with a low join and then a high join, and just needed to find the chain lengths that would make the piece straight and flat.
Mini-tutorial: adding new thread in the middle of a piece:
I don’t know if there’s a better way to do this out there, but I am pretty happy with the method that I came up with while stranded on an internet-less family vacation. It involves no knots (other than the tatting stitches themselves) and tucks the ends of the thread away securely. You will need a small clip that grips the ends of the threads, or a small elastic, or a bit of scotch tape, or really anything that a) you can use to secure two thread ends to the tip of your needle and b) you can easily pass knots over (so your fingers won’t do as well). I use small hairclips—the same ones I’ve mentioned using to regulate my picot size—which have a nub of plastic close to the hinge that is pretty grippy. Alligator clips, bobby pins or little tiny binder clips should also work.
 First, as you are working along in your pattern, stop when you a) have made at least one ds since the last picot/join/other funny business, b) have at least one ds to go before the next picot/join/other funny business, preferably at least two or three, and c) have about 3″ of working thread left. Drop this tail end for now, and call it the dead thread. In the photo at right, I have done a 6ds chain and 4ds, picot, 4ds, picot, 1ds of a ring on my pink thread.
 Cut your new length of thread and pick up one end. Hold this end together with your dead thread end and run the thread up in front of the needle, over it, down, and around to the right of and then in front of the two ends that you are holding together, making the first half of a double stitch. With the new thread, finish the double stitch as normal, ignoring the two ends. In the photos at right and below, I am splicing in a blue thread so you can see the splice clearly; in reality you would use a thread of the same color.


 Clip (or tie, or tape, or whatever) the two thread ends to the tip of your needle, moving the stitches you’ve made forward or back along the needle until the ends lie flat against it. For the rest of your ring or chain, treat these thread ends as if they were part of the needle. Finish your ring or chain, wrapping the thread ends in the new knots you’re making. In the photos, you may be able to tell that the blue (post-splice) stitches are a little bit bigger than the pre-splice (pink) stitches; this is visible in the finished work but is less glaring than a big ol’ knot and less likely to come untied and unravel your whole project.

 If you are replacing the needle thread, thread the needle with the other end now. Slide the ring or chain off the needle and finish it as normal, tugging gently on the protruding thread ends to make sure they haven’t gotten bunched up inside the knots. Make your next few rings/chains, and either now or when you are finishing up the piece, cut the thread ends off close to where they emerge. I recommend waiting until you have done at least one chain (or progressive/split ring, or anything that gets you away from that point) after the splice before cutting the loose ends; you can weave them back through the work to keep them out of the way in the meantime.


Now I am contemplating ways to use dramatic mid-ring color changes as a design element in a pattern…

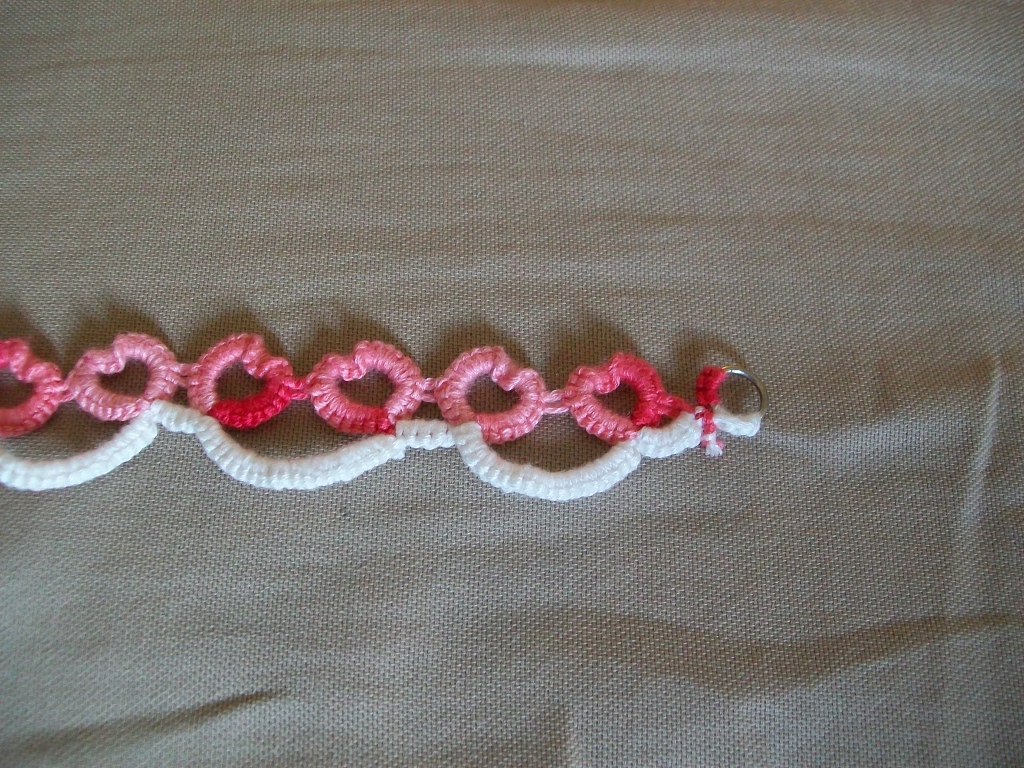
 Lastly, because I think it’s interesting, here’s a picture of the full piece, which shows my drafting process. I started on the left-hand side, where it’s all lumpy and distorted, and gradually improved over the first half-dozen motifs, then the rest is in the finished pattern. This one came together really quickly, because it’s so simple.