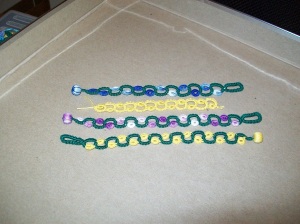
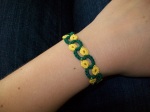
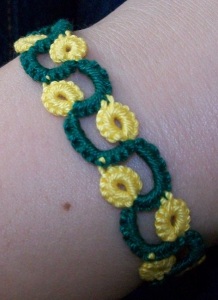
Today’s pattern is a tatted strip that looks best done in different colors (one for the ball and the other for the needle thread). It’s quite a narrow strip, works well as a bracelet, and would work well as a simple edging if you neglect the bracelet clasp bits of the pattern. It’s a simpler descendant of this pattern which I was surprised I hadn’t thought to try sooner.
To work in two colors, knot the ends of two threads together when you start the work and bury the ends in the first ring or chain as you would when joining in new thread. Start the first few knots of the pattern right up against the color change knot, in this case on the needle thread side. I like the pattern with green for the “vines” and a variegated thread for the “flowers” (although the yellow also works quite well), but your mileage may vary.
To start the bracelet:
- Ring 6ds, picot A, 6ds
- Chain 3ds
- Working as for a chain, in the ball thread: 6ds, (2 first-half single stitches, 4 second-half single stitches, 2 first-half single stitches)x3, 12ds, (2 second-half single stitches, 4 first-half single stitches, 2 second-half single stitches)x3, 6ds. Start pulling the core thread through, but pass the needle through the closing loop to form a self-closing mock ring. I found it works best to pass the needle through the loop two or three times in the same direction to make a longer connection.
- Chain 5ds, (2 first-half single stitches, 2 second-half single stitches)x3
- Shoelace knot
Repeat unit (start after step 5 above, repeat 1-3 as many times as you like or until bracelet is about 1/2″ shorter than you want it:
- Ring 6ds, picot A, 6ds
- Chain 4ds, join A of previous repeat, 2ds, (2 first-half single stitches, 2 second-half single stitches)x3
- Shoelace knot
Finishing the bracelet:
- Ring 8ds, small picot, 4ds
- Chain 4ds, join A of previous repeat, 2ds, (2 first-half single stitches, 2 second-half single stitches)x3
- Pass the needle through the small picot and tie a shoelace knot
- Chain 4ds
- Tie both threads together and wrap a pony bead in the needle thread as in this tutorial
- Tie threads together again, pass both through the center of the wrapped bead, and clip ends
 Obviously, if you just want an edging, ignore the first and most of the last section (steps 1-3 are a decent way to end an edging section, but you don’t need the bead). If you want a tasseled bookmark, ignore the first section and instead of making the wrapped bead make a tassel in step 5-6 of the last section.
The yellow piece shown is my working-out-the-pattern piece and does not have a bracelet clasp. The piece with blue “flowers” is scaled up, replacing every three stitches with four (except in the bracelet clasp, which is the same size).


Interesting stuff here. I would follow this, but I’m not able to find the follow button. Probably just these old eyes. 😊 I’ve been trying my hand at needle tatting, but haven’t done well enough to broadcast my accomplishments. I maintain n7net.me. The theme is not as focused as your is here. I’m all over the place…too many interests, too many hobbies.
Scott from Scott’s Place.
LikeLike
Thanks! I think wordpress moved the follow button not very long ago; it took me a while to find it myself, and it looks like it’s in the bottom-right corner of the screen in a little floating gray box. I hope you stick with needle tatting; I’ve found it a lot of fun.
LikeLike